There are times when we only want to run the laptop on an external monitor without laptop screen staying on (or with lid closed). However, without proper settings, your laptop will go into sleep mode, hibernate or even shut down when you try to close the lid or attempt to switch off its screen.
It’s not necessary to have your laptop or notebook computer screen stay on if you only want to use the secondary external monitor. You can actually close the lid of your laptop but still be able to use it with an external monitor. To achieve this, there are some settings you need to configure on Windows 10. Once set, your laptop can then work as if you are using it as a desktop computer with an external monitor. This short tutorial will show you how to do it.
This tutorial will be split into several parts. Refer to the table of contents below or simply go down the list to configure the system so that you are able to close the laptop lid without interrupting it but still be able to use it on an external monitor.
Tutorial: How to close laptop and use other screen on an external monitor
1. Configure the “close lid” action in power options
The very first step is to configure the close lid action in Windows 10 power options so that your laptop won’t go to sleep or shutting itself down when you close the lid of your laptop. Here’s how to do it.
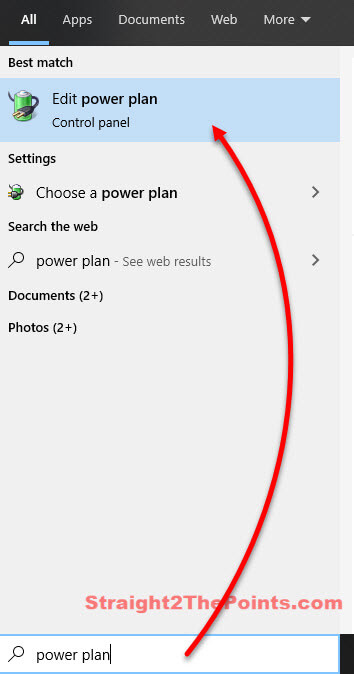
On the Windows 10 search bar, search for “power plan” or “edit power plan”, and open “Edit power plan” (control panel).
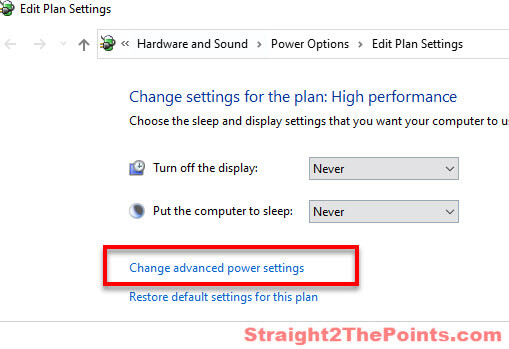
In the “Edit plan settings” window, click on “Change advanced power settings“.
In the “Power Options” window, expand Power buttons and lid, then Lid close action. Click on the drop down menu and select “Do nothing” for both “On battery” and “Plugged in”. (Depeding on your preference, if you want to be able to close the laptop lid without it going to sleep, hibernate or shut down only when you’re plugged in but not on battery, select other action for “On battery”.)
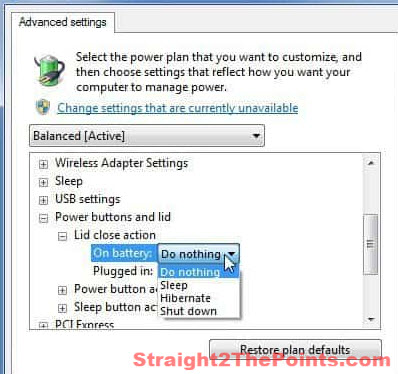
Note: Make sure the currently active power plan is chosen (High performance, balanced, or Power saver). If you often switch between the power plans, repeat the configuration for all power plans that you use.
Finally, click OK to apply and save the changes. After making the changes, your laptop will now continue to run even after you close its lid.
2. Connect your external monitor and configure display settings
Second step is to connect your external monitor to your laptop if you haven’t already done so. Then, configure the Display settings in Windows 10 so that the external monitor display accordingly.
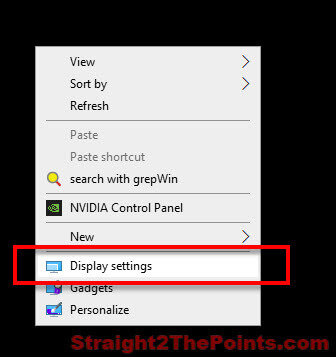
On your desktop screen, right-click any empty area to bring up the context menu. Then, select Display settings.
Under “Multiple displays” options, you have three options.
- Select “Show only 2” (usually 2 is your external monitor) and Windows will only show the main screen on only your external monitor. Your primary screen will go off, even without closing the lid.
- Select “Duplicate these displays” if you want to mirror both screen. This way will allow you to easily switch between your primary or secondary monitor without coming back to this setting to change to “show only x” option again.
- Select “Extend these displays” will extend display from primary to secondary or vice versa depending which you set as main display. Since you’re not going to use your primary screen (your laptop screen), this option is not an ideal choice.
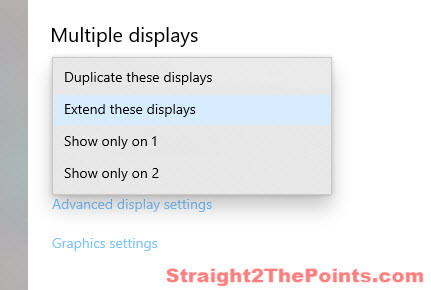
You can experiment with all these display options to see which fits your needs the most.
Once you have completed step 1 and 2, you should now be able to close your laptop lid while it’s running and use your external monitor for display.
Configure your audio output settings
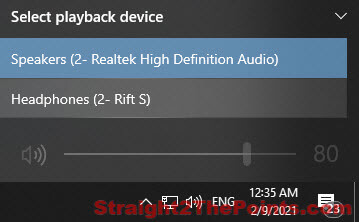
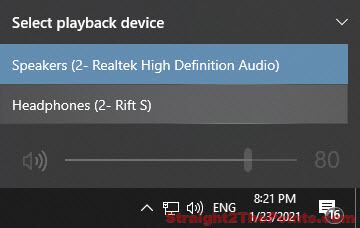
Optionally, if you also have an external speaker, you can easily switch over to the speaker by clicking on the speaker icon from the notification area on the Windows 10 taskbar. Then, select whichever audio device that you want Windows 10 to use as the main audio output device.
